
Germans love doing arts and crafts, especially during times of transition, like in the spring or fall. Families will often flock to the forests and fields on nice, sunny fall days, in order to gather supplies and ideas for their projects. Then on the gloomier, rainy days, they‘ll spend time at home with the kids doing crafts and realizing their envisioned projects. You might be surprised that there is such a huge interest in arts and crafts here in Germany, as there aren‘t any big arts and crafts supply superstores like the kind you see back in the States. However, they aren‘t really needed, as most of the big department stores here have a crafting section that will sell you all the basics. There are also online craft stores that can get you anything else that you might need...not to mention the fact that Germany is full of natural crafting resources. So why not put on some warm fall clothes, and some sturdy rubber boots, and give the German way of crafting a try? There are so many treasures that can be found in your local area alone. Go out and explore the woods, the fields, and the parks and see what you can find—plus its a great family activity your kids are sure to love! Be on the lookout for shiny chestnuts, acorns, beechnuts, interesting twigs and branches, moss, rose-hips, pine-cones and pretty colorful leaves and get to crafting!
Here are a few fun arts and craft projects you can try at home:
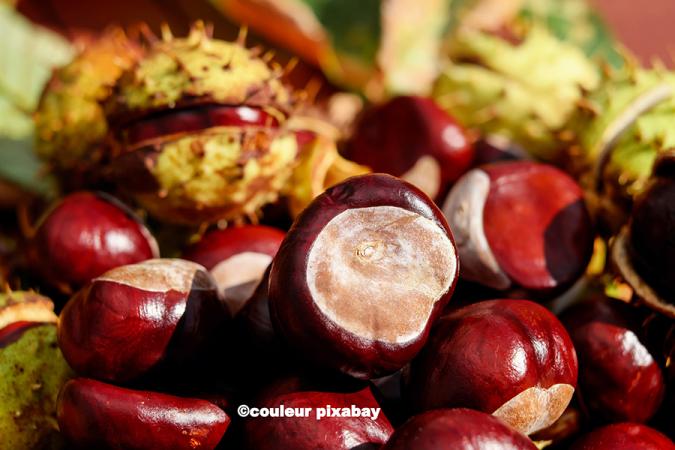
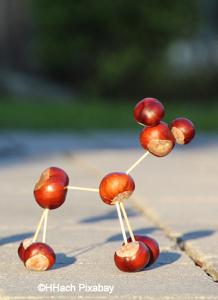
A German favorite, something that every kid has made at least once during their time in German Kindergarten, is the Horse Chestnut figurine. Horse Chestnuts are the really shiny, round, mahogany colored chestnuts you often find on the ground this time of year. In order to do this craft you will need a small hand drill, matches or toothpicks, a white permanent marker, and loads of Horse Chestnuts. Now you can assemble the chestnuts into little giraffes, horses, dogs, cats, or even into little round people by simply drilling small holes into the chestnut and then using the matches or toothpicks as the arms or legs of your figurine. Lastly, you can add fun faces to your figurine using your white permanent marker. Your kids will love playing with their new chestnut family and/or zoo.
You can also use these chestnuts to create fun fall garlands that can be used to beautifully decorate your home. For this craft you‘ll need a large needle, some string, and a small hand drill. First you‘ll want to drill holes through the chestnuts and then thread the string through them using your needle. From then on its a matter of creativity, feel free to add some rose-hip, pine-cones, acorns, or some colorful fall foliage to your garland... However, these garlands also make lovely jewelry for the feisty wood fairies and sprites that might be hanging around outside, so beware...if your garland suddenly disappears, now you know why.
Another fun fall craft idea is to invest in a sturdy wreath base, something made out of wood or Styrofoam, in order to make a beautiful, festive door wreath. You can start by putting a layer of moss on the wreath in order to hide its base. Afterwards, using a hot glue gun, you can add the various leaves, twigs with rose-hips, pine-cones, chestnuts, and all the other cute things you found out in the woods to the wreaths base. Finish it off with a bit of string, a few colorful berries, or even a hand crafted, sturdy cardboard, or wooden “welcome” sign / or a large wooden or cardboard letter representing your family name. These signs, as well as the giant letters, are easy to obtain from online stores, or from a local deco store in the area like Tedi, or Nanu Nana, if you don‘t feel like going that extra mile yourself.
If your looking for something more simplistic, why not try arranging a few nuts and leaves on a pretty platter, with a mason jar, and a candle or two and using it as a table centerpiece? 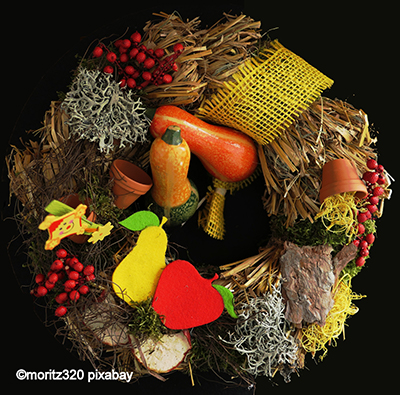 Speaking of which, you can also use old mason jars and leaves in order to create beautiful candle holders. All you need to complete this craft is: mason jars, colorful fall leaves, some decoupage glue, some straw ribbon (optional really), a hot glue gun and a few dried berries or acorns. Paint the jar with the decoupage glue and arrange the colored leaves on it as you like. Let the jar dry, and then tie some ribbon around the rim and decorate the knot and ends with the various berries, leaves and acorns you have. Now place a candle in the jar, and you are done – these make for great fall gifts too.
Another big project to undertake in the fall is creating your own lantern for the St. Martin‘s Day. Often, these lanterns are made out of French cheese boxes, colorful tracing paper and leaves, or other cut out shapes. These lanterns are often crafted in German kindergarten groups in preparation for the St Martin‘s Day parade but there‘s no reason you can‘t make your own.
However, my favorite fall craft has to be making bird treats for the winter. In order to do this craft you simply have to collect as many walnuts, hazelnuts, beechnuts, and rowan berries as you can find. Wash the berries and let them dry, then chop the nuts and set them aside. Next, you will need some bird seed and palm fat, like “Palmin” from the store. You will also need some string, aluminum foil, some branches and a pair of scissors. Last but not least you will need either cookie cutters, coconut shells, or clay flowerpots as these all work well as a base for your bird feed.
If you are using a coconut shell: drill a hole in the bottom of the coconut shell and cut some string to hang it up on later. Thread the string through the hole, make a loop and tie it to a short piece of the branch to prevent the string from slipping out. Close the hole up tightly with aluminum foil and set it aside. If you are using a flower pot you can simply move onto the next part. 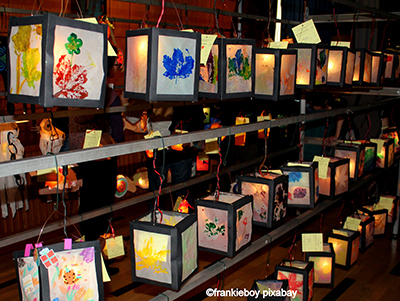 Next, take a large cooking pot and melt down the “Palmin” fat, on medium heat. Once its liquefied stir in the bird feed, berries and nuts—blend it all well.
Now slowly pour the mixture into your form, be it a clay flowerpot or your coconut shell and let it sit and harden. You can also use a cookie sheet, some aluminum foil, some string, and a few cookie cutters in order to make little bird “cookies”. Simply lay your cookie cutters down flat on your aluminum foil with a thin piece of string laying underneath and over your cookie form. Then pour your mixture into the cookie cutters as they lay flat on the foil (make sure your string is partially submerged as well) and let them dry and harden. Once they‘ve finished drying, you can remove them from the form and you should hopefully be able to tie your string so that it can be used to hang your bird cookies from trees or bushes.
Your bird food should then be stored in a cool, dry place, and the “cookies” can be wrapped in plastic wrap to keep them safe. Start offering your bird treats when the harvest time is over and the fields and trees are empty.